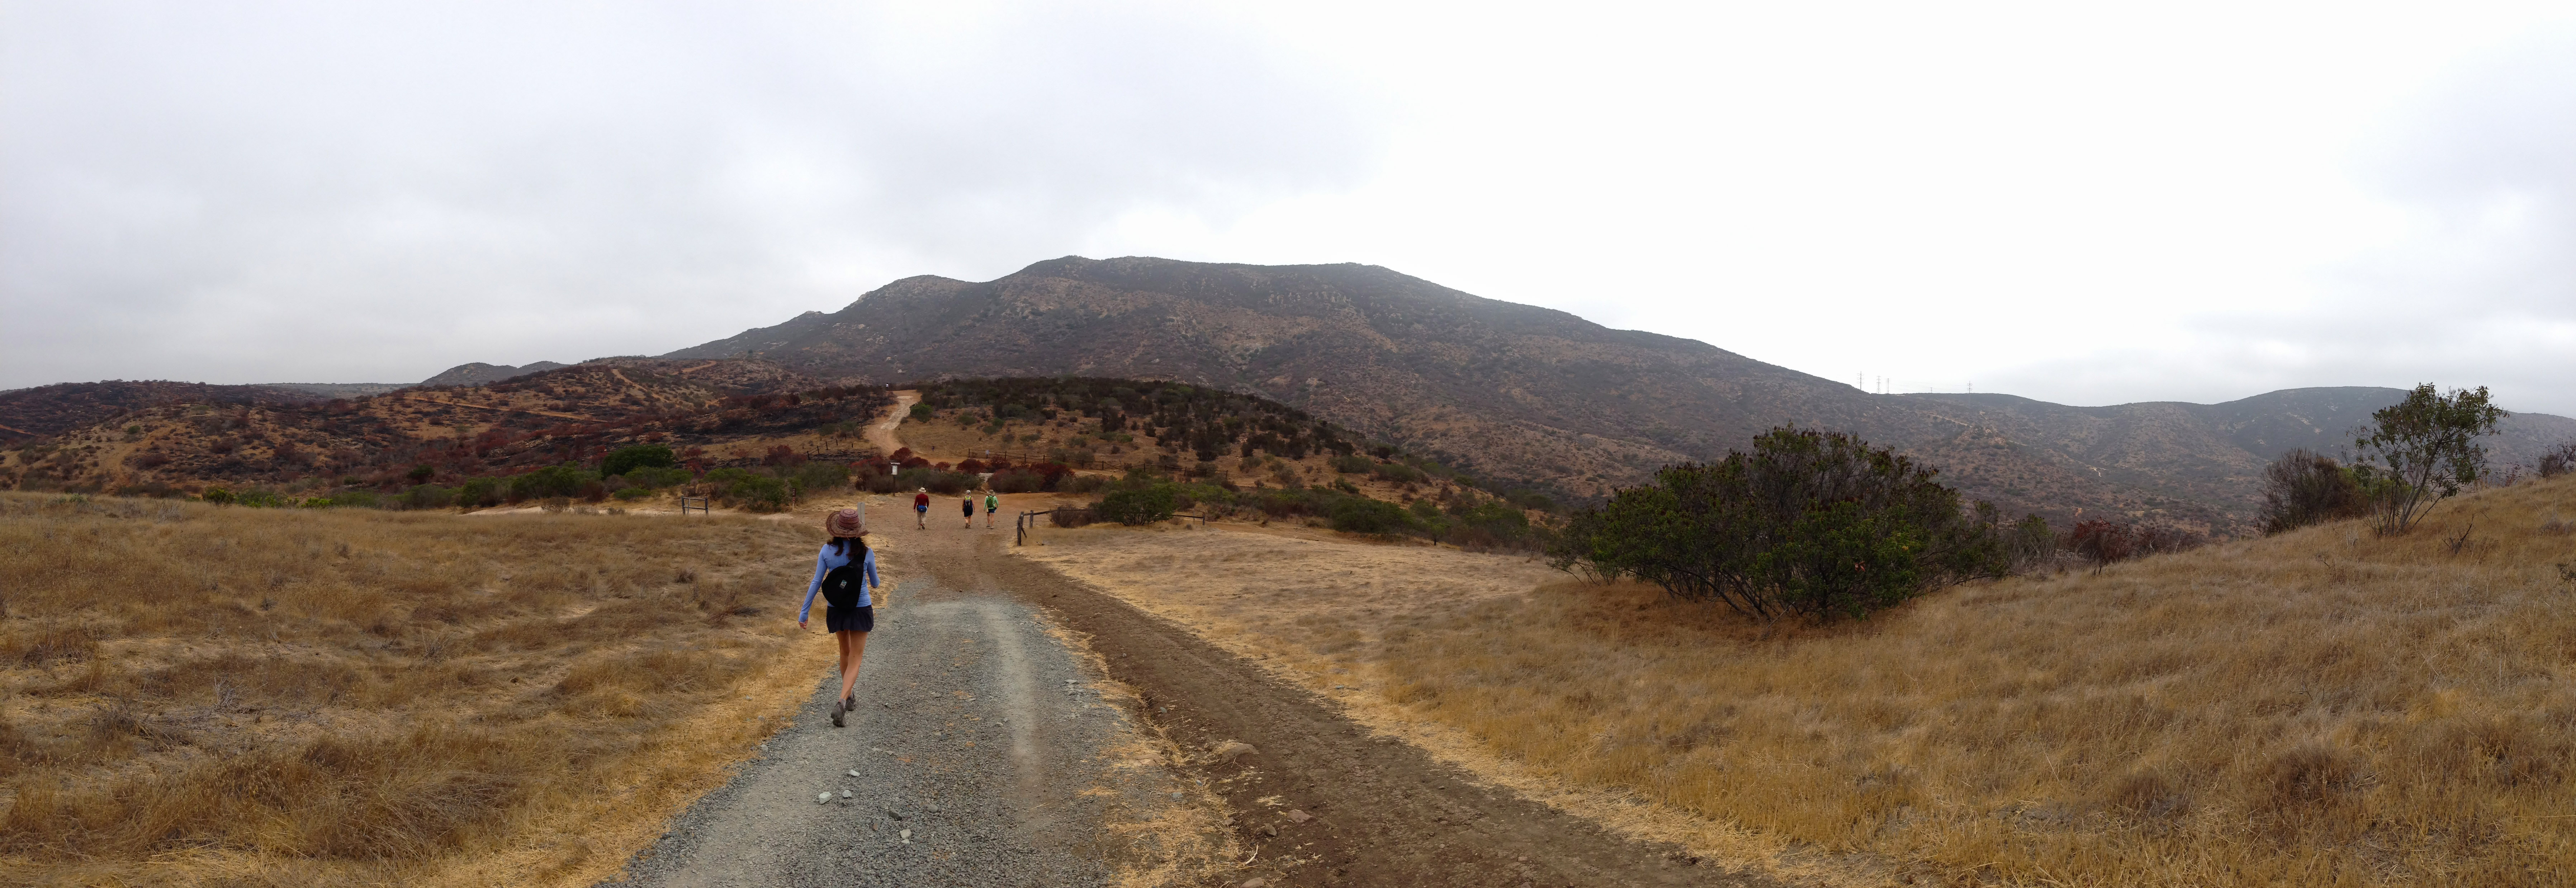
Heading towards North Fortuna Mountain
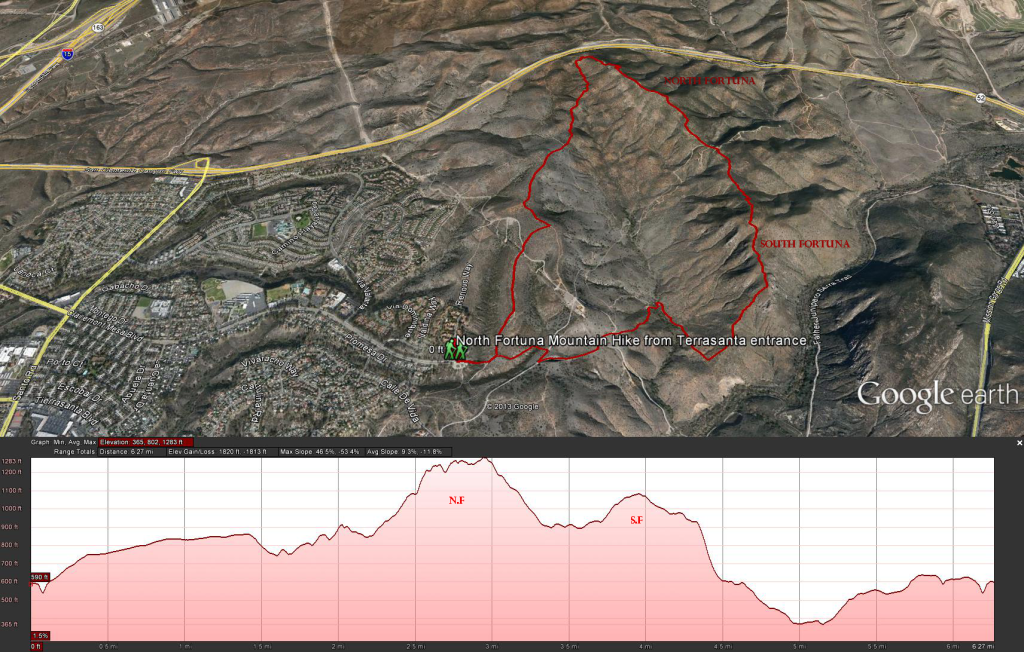
Distance: 6.27 Miles by Google Earth, 7.20 miles using Map My Hike. Elevation Gain and lost : 2,306 feet. Time to complete: 3 – 4 hours depending on fitness levels
Google Earth: North Fortuna Mountain TrailMission Trails Park has numerous trails. This write up is just for loop leading from the Tierrasanta entrance up to North Fortuna Mountain across the saddle to South Fortuna Mountain, down the “Stairway to Heaven” and back to the beginning. There seems to be a discrepancy between the Mileage I get from Google Earth and what I get from Map My Hike app on my iPhone. Even within the app I will get one set of numbers for the mileage, and when I go to edit the maps the mileage changes so its hard to say what is completely accurate. When I asked about this issue this is the response I received.
Read the response from Map My Hike
Thanks for contacting us. The reason your workouts have differing distances is because of a GPS error and how our app handles these upon uploading. Once saved the workout is cross referenced with Google Maps for correct distances, and if there are any discrepancies one of the areas is replaced with Google Map data. You can check to see which is correct by identifying “spikes” in the route. If the route has many spikes then you can assume the route page is more correct for distance.
The steps below should resolve most problems with GPS tracking including incorrect tracking, errors with recorded distance, and it should also reset algorithms to improve statistics calculations. Be aware that GPS accuracy depends on a variety of factors including the device you are using, battery life, your cellular network, weather conditions, and whether you are in an open area (trees and buildings can obstruct GPS). Keep this in mind and please know that slight miscalculations are to be expected.
If you have any workouts that appear on the app but not the site navigate to the app settings and select the tab labeled “Unsynced Workouts” to sync the information to the site before deleting and reinstalling the app to your phone. Failure to do this could result in recorded workouts being lost.
The following are a set of instructions to make sure the app is able to successfully connect to a GPS signal. First, ensure that you have enabled GPS for the app. Instructions on how to do this are as follows:
iPhone (iOS) devices: System Settings > Privacy > Location Services and turn the switch on for MapMyRun Android: Settings > Personal > Location Services. From here enable Google location services and Standalone GPS Services Windows Phone: Settings > System. From here enable Location, Cellular, and Wi-Fi services to ensure the best recording experience.
If the GPS is enabled then try the following steps, they are known to resolve almost all issues.
- Delete the application from your phone entirely.
- Re-download the application from the app store and update to the latest version. You will not be charged again for the app you have downloaded previously (even though the prompt is to “buy” the app).
- Restart your phone.
- Turn off wifi before starting your workout. Wifi is known to decrease the accuracy of your GPS and also cause network data transfer conflicts.
- Navigate to your location settings and reset the location warnings option. This will ensure the prompt to allow MapMyFitness access to GPS appears upon the next open session.
- Navigate to your device’s System Settings and from the Date and Time settings enable automatic time zone. This will prevent GPS points from being reported at an incorrect time when connecting to a GPS signal.
- If you receive a prompt about GPS lock, please allow up to two minutes for a better GPS signal before recording your workout.
- When recording make sure your device has a clear line of site to the sky so it can accurately and reliably stay connected to the satellite for your timezone.
- You may need to turn auto pause off from the in-app settings. Auto pause goes into effect after 30 seconds of inactivity or when travelling less than 2.4 mph and can cause some problems with distance and time measurement.
- Specifically for calorie calculation errors related to GPS signal please ensure your profile height and weight are correct on the site.
So realize that if you use these apps the mileage you see may vary from the known mileage’s of the hike’s, even so these apps make handy tools, giving you mileage, elevation, split distance , maps of your routes, and many other important data sets.
To Get there: Take the Clairemont Mesa Blvd exit from the 15 and head west 2.7 miles until it ends at the Tierrasanta Entrance to Mission Trails Park
Starting from the Tierrasanta entrance you will head over the bridge into the park. The signs can be kind of confusing, with many names on the signs but no direction pointed out. Just remember to keep following the signs that have North Fortuna posted on them. You will head across the park, crossing many trails, it’s not important that you stick to one trail, again just make sure you keep seeing North Fortuna posted on the signs that you see and keep heading to the tallest mountain in the park. There was a recent 110 acre brush fire in June of 2013 and you will be crossing through this area on your way up to the bottom of the mountain. Close to 1 mile 1/2 into the hike you will start hitting the uphill climb. At around 2.3 miles or so you should see the trail split left and right, your going to want to head right, but it should be marked for the North Fortuna Summit. Your going to be heading up some steps now for a little bit. At around 2.95 miles you should reach the summit of North Fortuna mountain. Rest a bit, have a bite and look around, you may find a few Geocache boxes laying around. If you look south you should see the South Fortuna mountain a little bit lower and Cowles mountain off in the distance. When your ready head that way and you’ll head down North Fortuna Mountain into the saddle at about 3.3 miles and then start heading up South Fortuna Mountain. At around 3.96 miles you should hit the South Fortuna Mountain Summit some 200 feet lower then the north summit. Look around and then keep heading south for the gorge. At around 4.33 miles you should have a nice view point of the gorge. If you look across the gorge you should see some trails that head up to some rock faces on the other side (the climbers loop trails) in the Kwaay Paay mountain rock climbing area , these are used by rock climbers quite often and rock climbing class’s are often taught there. Gander at this for a while and then head west down the “Stairway to Heaven”, as steep 300 feet or so of stairway back down to the park floor, this is a popular spot for trail runners and 5K and 15K runs are held here in the summer. Keep following the trail and around 5.15 miles you will cross the little creek area and start heading back to the beginning of the hike. Once across the creek the trail will split left and right, even through they will both get you to the same place take the left trail, its more direct. Around 5.45 miles you should meet up with a road, keep following the road up and to the right as you head back. Around 5.8 miles you will meet another road, take a right heading north east for 7/10 of a mile to another trail on your left that will take you directly back to the trail head. What a great hike, now its time for some lunch and a cold beer.
Weather forecast for the hike:


